

Zero to Hero –How to Onboard Microsoft Defender for Endpoint for Windows Server – Complete Guide
Introduction
Welcome back to the Zero to Hero series! In our previous article, “How to Onboard Microsoft Defender for Endpoint for Windows Clients – Complete Guide”, we focused on securing your Windows endpoints. That was the first step toward building a strong foundation for Microsoft Defender for Endpoint.
Now, it’s time to take the logical next step: onboarding servers. Servers are critical assets in any environment, and onboarding them can be a slightly different compared to client devices. This article will guide you through the process of onboarding Windows Server systems onto Microsoft Defender for Endpoint
Onboarding Defender for Endpoint for Windows Clients
This guide focuses on Windows server operating system. Be aware, the Defender for Server section
Decision Guide for Client Deployment
Before you start the server onboarding, identify your environment architecture and align the rollout method accordingly. This section provides the decision framework
Prerequisites
Before you start onboarding servers with Microsoft Defender for Endpoint, it’s essential to clarify licensing, as this can impact which onboarding method you use. Server licensing can be confusing, from time to time.
There are two main licensing options for servers:
Defender for Endpoint for Servers (Classic License)
This is the traditional licensing model. When choosing the classic license, it is sufficient if the licenses are assigned according to the tenant. It is not necessary to assign the license to the machine. Downside, you need to keep track of your licenses, therefore no billing based on consumption. Refer to section: Defender for Endpoint for ServersDefender for Server (Pay-As-You-Go Model)
This model is integrated with Microsoft Defender for Cloud and billed based on consumption. It’s often preferred for hybrid or cloud-centric environments. Refer to section: Defender for Cloud
For a detailed licensing breakdown, please take a look at Zero to Hero - Getting Started with Microsoft Defender for Endpoint – Basics, Licensing & Features.
Harware & OS Requirements
Hardware (minimums for supported editions):
CPU: 2 cores (min), 4 preferred
Memory: 1 GB (min), 4 GB preferred
Microsoft’s minimums for Defender for Endpoint are documented at a high level in Minimum requirements; always keep devices on vendor‑supported OS with current security patches.
Supported client operating systems :
Windows Server 2008 R2 SP1 (MMA or (recommended) New Deployment Tool)
Windows Server 2012R2 and later (including Core installation)
Windows Server Semi-Annual Channel, version 1803 and later
Linux (various distributions supported)
For more information take a look at: Minimum requirements for Microsoft Defender for Endpoint - Microsoft Defender for Endpoint | Microsoft Learn
If you are migrating from another AV or EDR solution, additional care is required to run MDE side-by-side or guarantee a seamless migration. Since this is a separate topic for a separate guide, this topic will be covered in detail in a future article. Or please refer to MS Docs: Microsoft Defender Antivirus compatibility with other security products — Microsoft Defender for Endpoint (Microsoft Learn) .
Network & Connectivity
For a detailed overview of all network requirements, allowed URLs, and connectivity considerations, please refer to: Zero to Hero – How to Onboard Microsoft Defender for Endpoint for Windows Clients – Complete Guide
Defender for Cloud
Microsoft Defender for Cloud is a cloud-native application protection platform (CNAPP) designed to safeguard cloud-based applications and workloads against cyber threats and vulnerabilities. It combines multiple security capabilities into a single solution:
DevSecOps Integration
Unifies security management at the code level across multicloud and multi-pipeline environments, enabling secure development practices.Cloud Security Posture Management (CSPM)
Continuously assesses your cloud environment and surfaces actionable recommendations to prevent breaches.Cloud Workload Protection Platform (CWPP)
Provides specific protections for servers, containers, storage, databases, and other workloads.
Defender for Server licensing is part of Defender for Cloud. This means we can use Defender for Cloud as the vehicle to track licensing per machine.
When you enable Defender for Server in Defender for Cloud, licensing and billing are handled automatically based on consumption.
You can activate Defender for Server at two levels:
Subscription level: Applies protection and licensing to all resources within the subscription.
Resource level: Applies at ressource level. Since this is an option not available in the portal, microsoft provides you with a powershell script. Refer to: Protect your servers with Defender for Servers - Microsoft Defender for Cloud | Microsoft Le arn
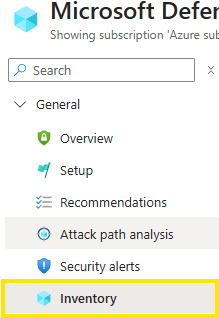
For a comprehensive list of all onboarded resources, see the Inventory section in Defender for Cloud. Navigate to Defender for Cloud in Azure portal:
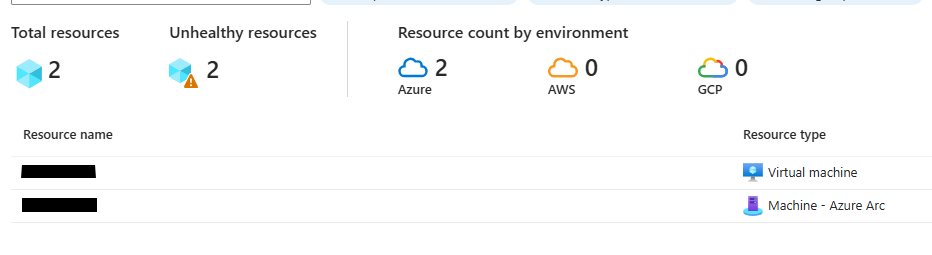
| Resource Type | Explanation |
|---|---|
|
Servers – Defender for Endpoint |
Machines onboarded via direct onboarding |
|
Virtual machines |
Machines hosted in Azure |
|
Machines – Azure Arc |
Machines onboarded via Azure Arc |
Enable Defender for Server
When you enable Defender for Servers Plan 1 or Plan 2 and configure the Defender for Endpoint integration, the MDE agent is automatically provisioned on all supported machines within the selected subscription.
Subscription:
You can enable the Defender for Servers plan from the Environment settings page to protect all the machines in an Azure subscription, AWS account, or GCP project.
To enable the Defender for Servers plan:
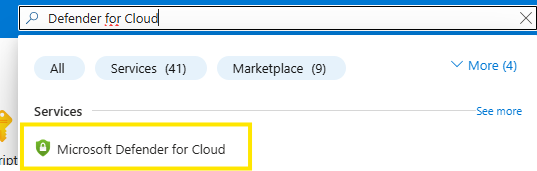
Sign in to the Azure portal.
Search for and select Microsoft Defender for Cloud.
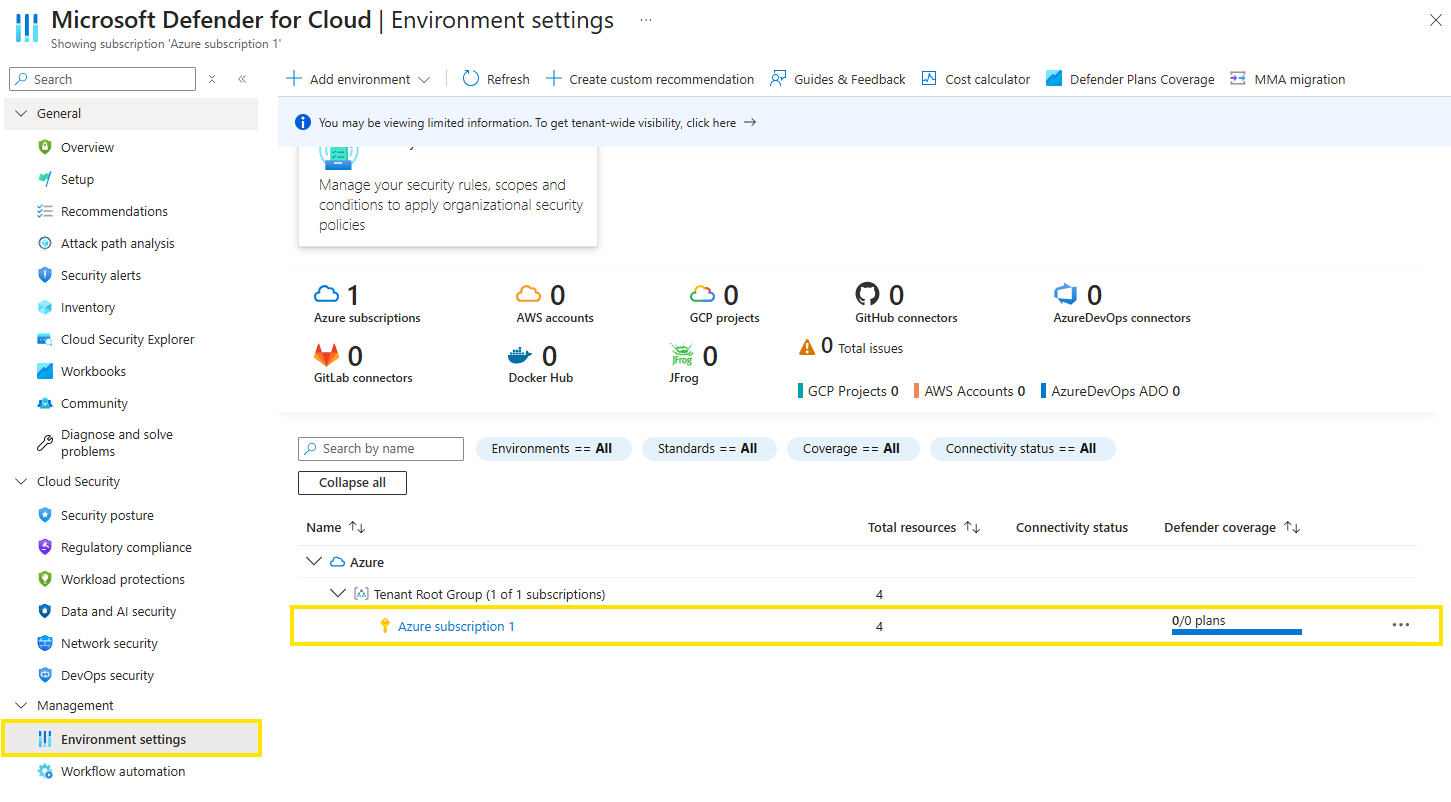
In the Defender for Cloud menu, select Environment settings.
Select the relevant Azure subscription, AWS account, or GCP project.
On the Defender plans page, toggle the Servers switch to On.
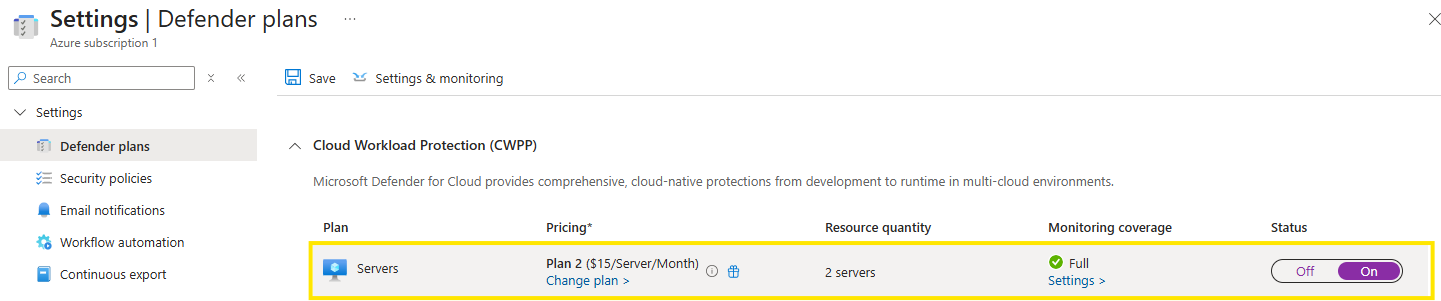
Verify the mde integration is enabled: through “Settings & monitoring” on top of the page

Now you might be wondering:
“How does my server get into Defender for Cloud so it can onboard to Microsoft Defender for Endpoint?”
Great question!
For Azure virtual machines, the process is fairly simple: they’re automatically listed in Defender for Cloud for any enabled subscription and onboarded directly through Defender for Servers respectively Defender for Cloud.
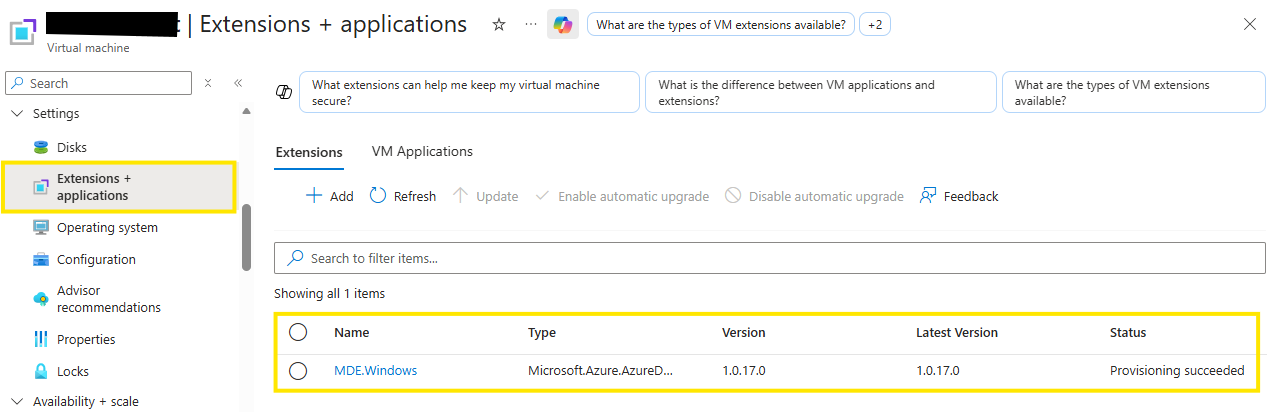
One of my AzureVMs got the MDE Agent installed through Defende for Servers with a machine extension.
But what about on-premises servers or multi-cloud VMs? That’s where Direct Onboarding or Azure Arc comes in…
Direct Onboarding
Microsoft Defender for Cloud lets you onboard on-premises and multicloud servers through Microsoft Defender for Endpoint, without deploying additional agents.
Direct Onboarding is a native integration between Defender for Endpoint and Defender for Cloud. Once enabled:
Non-Azure servers with Defender for Endpoint appear in Defender for Cloud under the selected subscription.
Defender for Cloud uses this subscription for licensing and billing
Things to keep in mind…When you enable Direct Onboarding:
If Defender for Servers is off for the subscription, Plan 1 will automatically be enabled after saving the setting.
It takes up to 24 hours for machines to sync to the inventory in the designated subscription.
Direct onboarding is enabled fairly easy in the Defender for Cloud portal
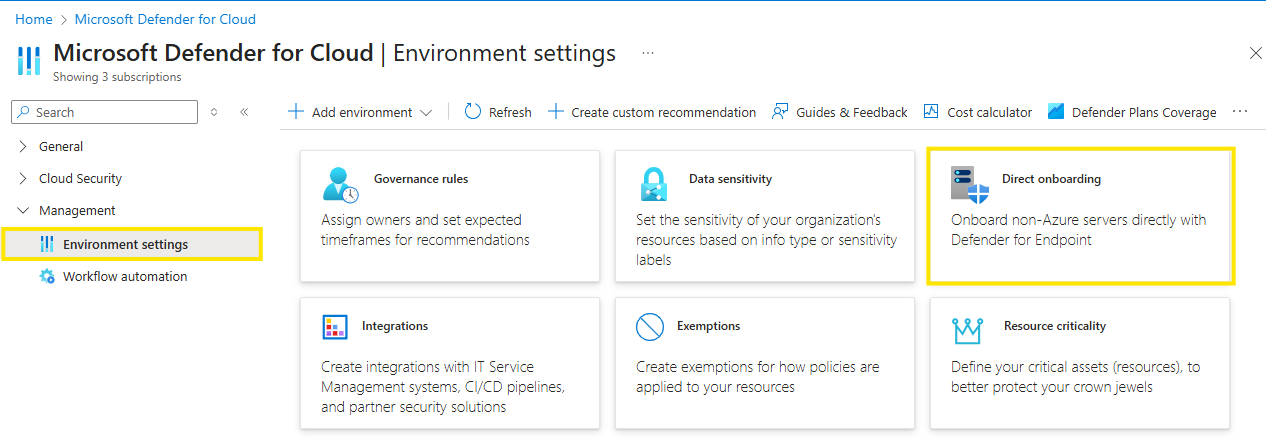
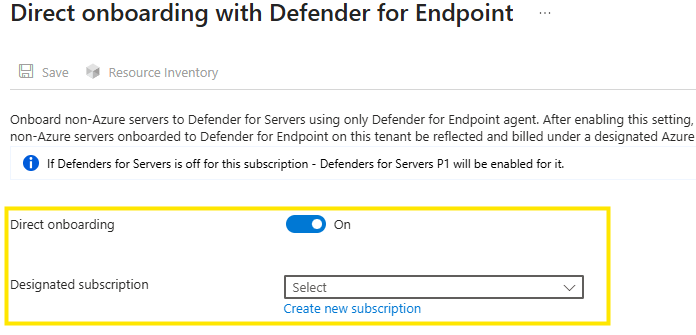
Activate direct onboarding and select the subscription you want to use.
When to Use Direct Onboarding ?
If Azure Arc introduces too much overhead or complexity, direct Onboarding is an alternative. It provides a integration between Defender for Endpoint and Defender for Cloud without extra agents. Once enabled, machines onboarded to Defender for Endpoint through your familiar onboarding ways (GPO, SCCM… refer to Zero to Hero – How to Onboard Microsoft Defender for Endpoint for Windows Clients – Complete Guide) sync to Defender for Cloud inventory.
But not too fast!... there are still benefits for AzureArc. It provides additional management features (especially when you want to use Defender for Server Plan 2 Features !) and onboarding to the service can be controlled more granular! So its recommended to consider using Arc!
Azure Arc Onboarding
Azure Arc acts as a bridge that extends the Azure platform beyond its native boundaries, enabling you to build and manage applications and services across datacenters, edge environments, and multicloud infrastructures.
What is Azure Arc-enabled Server?
Azure Arc-enabled servers allow you to manage Windows and Linux physical servers and virtual machines hosted outside of Azure, whether on-premises or in other cloud providers. These machines are considered hybrid machines in Azure Arc.
Management of hybrid machines using standard Azure constructs like Azure Policy, tags, and resource groups
Each connected machine receives a Resource ID, making it a first-class Azure resource.
Supports x86-64 (64-bit) architectures only.
(The Azure Connected Machine agent does not run on x86 (32-bit) or ARM-based architectures.)
Why Use Azure Arc for Defender for Servers?
Enables Plan 2 features and advanced capabilities like Guest Configuration, Azure Policy, and Update Management.
Provides consistent management for hybrid machines similar to native Azure VMs.
Azure Arc offers various ways to onboard your hybrid machines. In this blog article we will look at only one of them, but I will provide you with additional resources for all the other ways. Select the way that fits you best.
Some Security Consideration when using Azure Arc
Most organizations are aware of the classic attack path escalation: an attacker compromises on-premises infrastructure, then pivots to the cloud.
With Azure Arc, there’s technically a potential path in the opposite direction: compromise or misuse of cloud roles can exert high-impact control over Tier‑0 assets on-premises through Arc’s extensions and policies.
Enabling Azure Arc on Domain Controllers or other Tier‑0 servers introduces a powerful management plane over your sensitive assets (e.g Azure ARC script extensions). Thats something that needs to be considered when using ARC for those assets. This doesnt mean, you cant use Arc for thse assets, it basically means, that extra care needs to be taken.
Strict RBAC/Limit access to the sensitive assets
Separate Subscription or Ressource Group
Limit ARC capabilities with monitoring mode
Review access and policies regularly
Connect machines to Arc using a deployment script
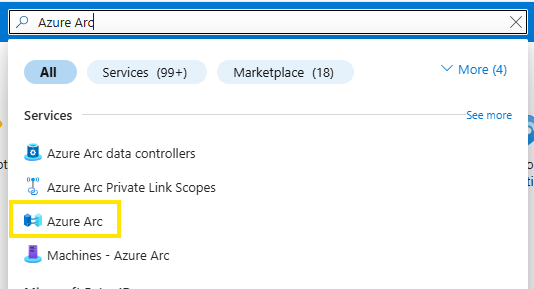
To find Azure Arc in the Azure Portal, you can either follow the steps under the "Services" section or use the search function.

Onboard existing machines
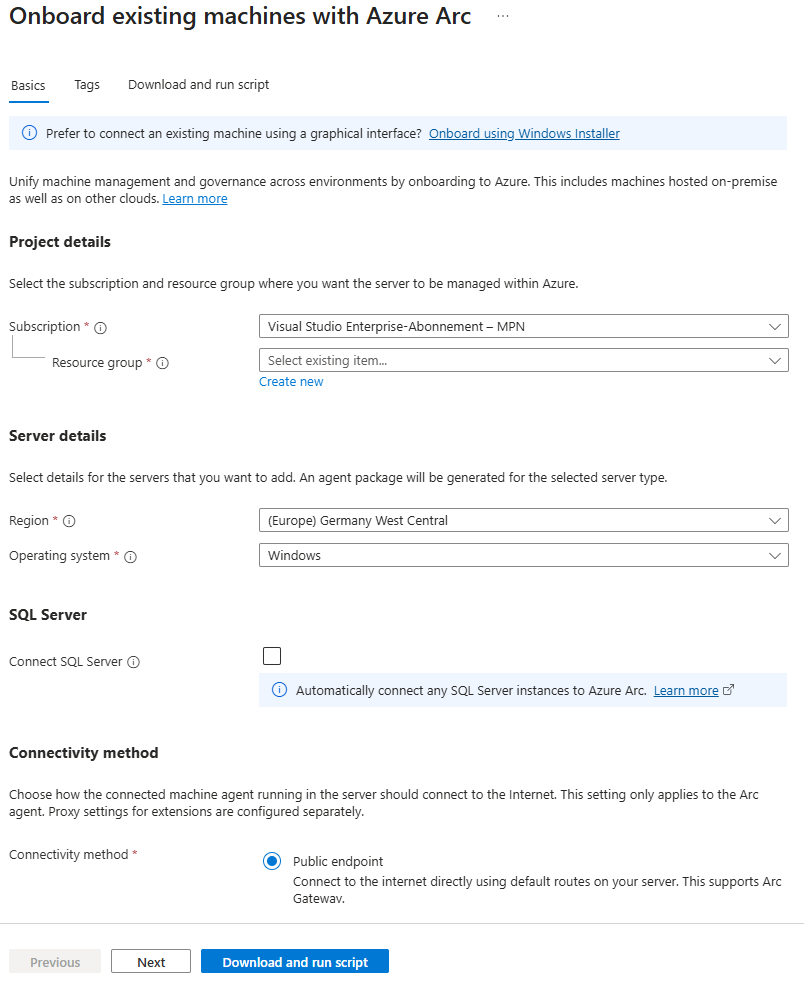
Fill out the necessary fields, such as the desired Subscription, Ressoruce Group and Region the server is later put into. Download the onboarding script.
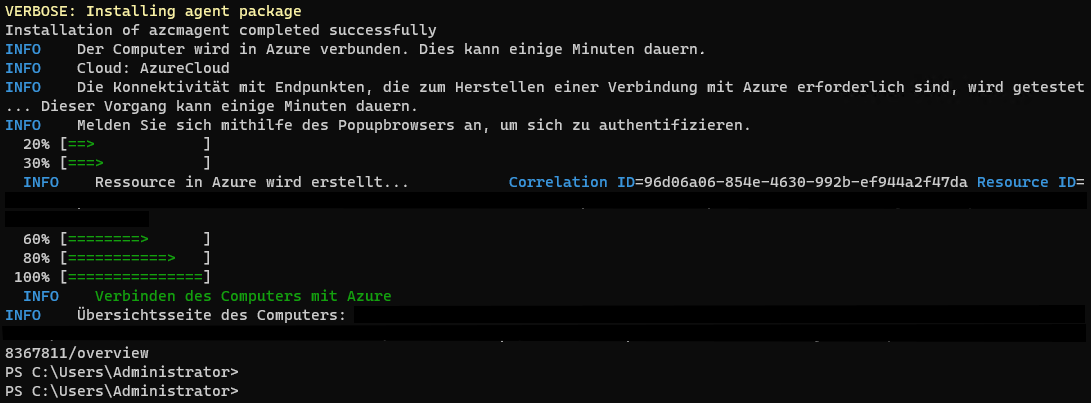
Run the script in an elevated powershell on your designated machine.
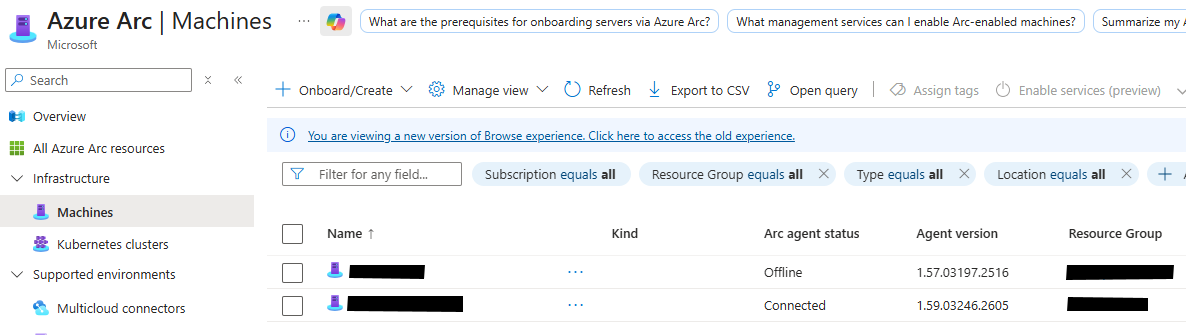
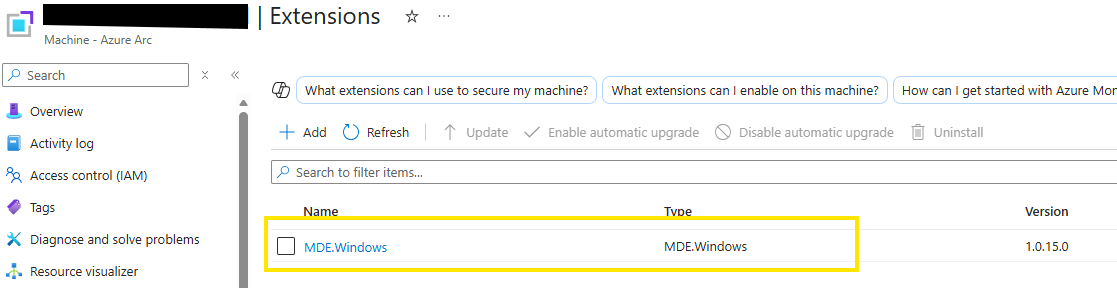
Your machine is now successfully ARC onboarded. Therefore your server will be visible in Defender for Cloud and Defender for Server (if enabled for the right subscription) we will now onboard MDE to your Arc-enabled server. Again through the MDE extension(like on Azure native machines)
Connect machines interactivley
Connect machines from Windows Admin Center:
Connect machines to Azure Arc with PowerShell:
Connect Windows Server machines through Azure Arc Setup: (This feature only applies to Windows Server 2022 and later. It was released in the Cumulative Update of 10/10/2023.)
Connect machines at scale
Connect machines using a service principal
Connect machines using Configuration Manager script (SCCM)
Connect machines using Configuration Manager custom task sequence (SCCM)
Connect machines using at scale using group policy
Connect machines using at scale using Ansible Playbooks
Connect machines from Azure Automation Update Management
Connect VMWare vCenter managed machines
Connect SCVMM managed machines
Defender for Endpoint for Server
If you decide not to use Defender for Server licensing (Pay-As-You-Go via Defender for Cloud) and instead go with the classic license, you can onboard your servers using the onboarding package from the Defender Security portal.
This approach allows you to leverage your existing onboarding methods, such as:
Group Policy (GPO)
System Center Configuration Manager (SCCM)
New deployment Tool
Manual onboarding scripts
We’ve already covered these onboarding methods in detail in the client onboarding article:
“Zero to Hero – How to Onboard Microsoft Defender for Endpoint for Windows Clients – Complete Guide”.
Refer to that article for step-by-step instructions, as the process for servers is largely the same.
Verify Rollout & Troubleshooting
It’s important to keep track of your rollout progress to ensure that all servers are properly onboarded and protected. Missing out devices can create blind spots in your posture.
We’ve already covered this topic in detail in the client onboarding article:
“Zero to Hero – How to Onboard Microsoft Defender for Endpoint for Windows Clients – Complete Guide”.
The same principles apply to servers.
In that article, you’ll find:
Verification steps such as running detection tests and checking onboarding status in the Security portal.
How to use Event Viewer to confirm successful onboarding.
And of course troubleshooting tips with tools like MDE Client Analyzer, log reviews, and more.
For step-by-step instructions and best practices, please refer to the Verify Rollout & Troubleshooting section in the client guide. These methods work for both Clients and Server systems.
Conclusion
With this chapter, we’ve completed the next step in our Zero to Hero journey: onboarding Windows Server systems into Microsoft Defender for Endpoint. We explored the different onboarding options like Defender for Cloud with Direct Onboarding and Azure Arc.
Servers are a critical part, they often host sensitive workloads and act as key infrastructure components, making them prime targets for attackers. Ensuring they are properly onboarded and protected is important for a strong security.
In the next articles, we’ll cover the remaining onboardable operating systems: Linux and macOS, ensuring that every endpoint in your environment is secured under Defender for Endpoint.